Now that you have received your CH401 CloudHawk hardware tracking units, please review the following document which provides tips and best practices on installing your devices.
The following details will help ensure that you get the best performance from the hardware.
About the CH401 CloudHawk Tracking Hardware
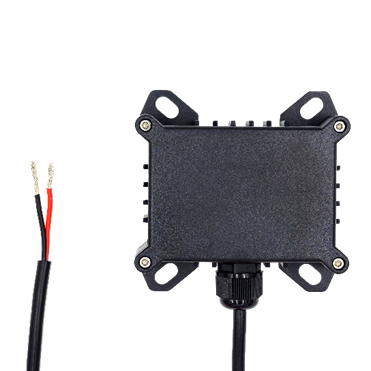
The following instructions are for installing the CH401 CloudHawk Tracker. The CH401 supports wireless BLE sensors and wired voltage monitoring.
Things to Know Before You Get Started
- The CH401 hardware shipped to you has already been added to your Account.
- For the target vehicle/asset, plan on connecting the CH401 unit to a constant power source. Devices are typically delivered with a battery charge level between 60-100% capacity. If the battery is drained, connect the CloudHawk hardware to a 8 ~ 40V power source (Red = Positive; Black = Negative) and it will come on-line within a few minutes.
- During installation, the installer has the ability to confirm that the GPS signal level is adequate, especially if hiding the tracker. Instructions below are included on how to complete this test.
How to Access the Installer Portal
CloudHawk has a specifically designed installer portal for designated installers. This portal is completely mobile friendly and allows installers to view information pertinent to hardware health and setup.
You can access the installer portal at: https://installer.mycloudhawk.com
Login credentials will be sent by your admin before installs begin. Alternately, you may receive an email with individual links to each asset. In this case, no login is required, and you may skip the first 3 steps below after clicking the link for the serial number (SN) you are installing.
If you're an Admin user and need to provide an installer with access to the Installer Portal, see Adding New Users to Your CloudHawk Portal and select the Installer role.
If you'd prefer to send temporary links, see Share Temporary Installer Portal Links
- Login to the installer portal using
- Scroll or search for the SN of the unit being installed.
- Click on the SN to access the configuration page for that unit.
- From the configuration page, you can check GPS and Cellular signal levels to confirm the install location will work.
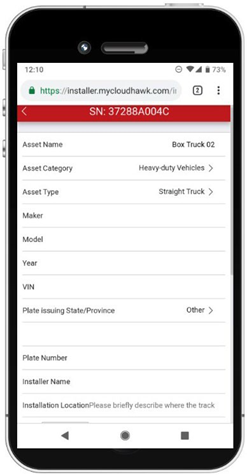
- Clicking on the “Asset Name” field will bring you the asset information page, here you can fill-in the asset name and other identifiers.

Installation Steps
- Select a location for installation that supports access to constant electrical power.
- Place the CloudHawk tracker in the location you intend to install.
- If you are hiding the tracker in a new location that you have not tested GPS signal level, you can verify that the location supports adequate GPS signal level which ensures that it will continue to track. Using the installer portal, confirm the GPS signal strength is greater than 29. It is recommended to take the asset for a short trip of at least 1-2km and confirm the GPS signal level while in transit.
- Connect the CH401 unit to a constant power source.
- Red – Positive (8 ~ 40V)
- Black – Negative

- The CH401 red and black wires should be connected directly to a 8 ~ 40V circuit with constant (not ignition-only) power. Install a 3 Amp in-line fuse on the red wire.
- Use a solder or crimp terminals to connect the wires.
- Use anti-corrosion grease and shrink tubes with internal adhesive on all connections and unused wires.
Connecting Wireless Sensors
The first installation step is to configure the sensor in the installer portal:
- Click “Add new sensor” at the bottom of the configuration page
- Select the type of sensor you are installing. Be sure the select the “Wireless” version for sensors that have both wired and wireless variants.
- Click on the Sensor ID field and select the sensor you are installing. You fill find this ID on a white label on the physical sensor. If you have a large number of sensors available in your account, you can use your browser’s Find function (usually Ctrl+F) to locate the correct ID.
- Fill in the “Name” field. Typically, customers use the location of the sensor as the name. For example, “Front” or “Trailer Door”
- Click “Save”.
Ignition Detection
- This input detects if the vehicle engine is running. Once connected, it automatically updates the engine hour field in the CloudHawk portal.
- To configure ignition detection, follow the steps above to add a sensor and select Ignition detect as the Sensor and Red for the Type. You will also need to specify 12V or 24V for the system to properly detect the alternator. This will monitor the incoming voltage to determine whether the alternator is running and report the ignition status based on that reading.
