
Do you need to give CloudHawk Portal access to other employees? Having real-time, readily available information at their fingertips will enable better and faster decision making, ultimately saving you time and money.
In this article, we will show you how to add new users to your account.
To perform this process, you must have a user account with the Admin role.
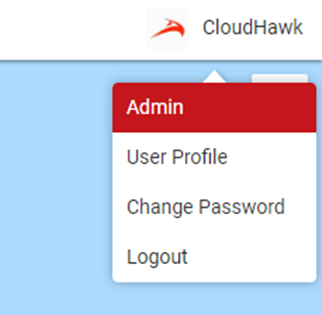
In the top-right corner of your CloudHawk Portal, hover your cursor over our name and select Admin.
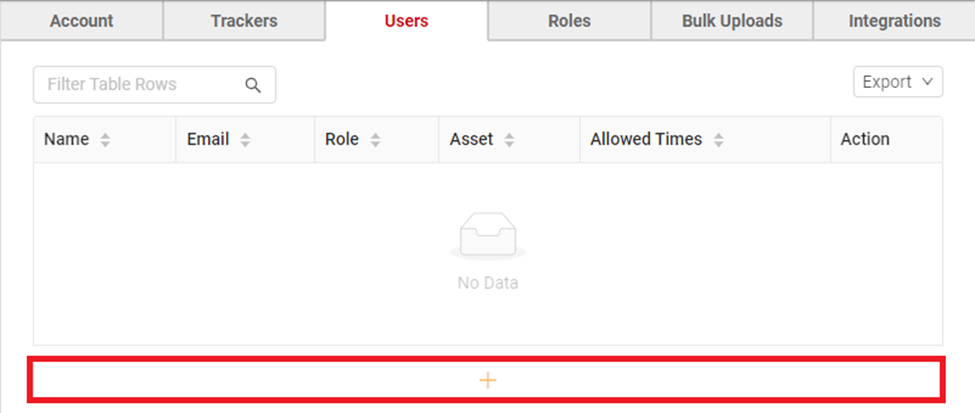
Click Users and then the + icon near the bottom of the page.
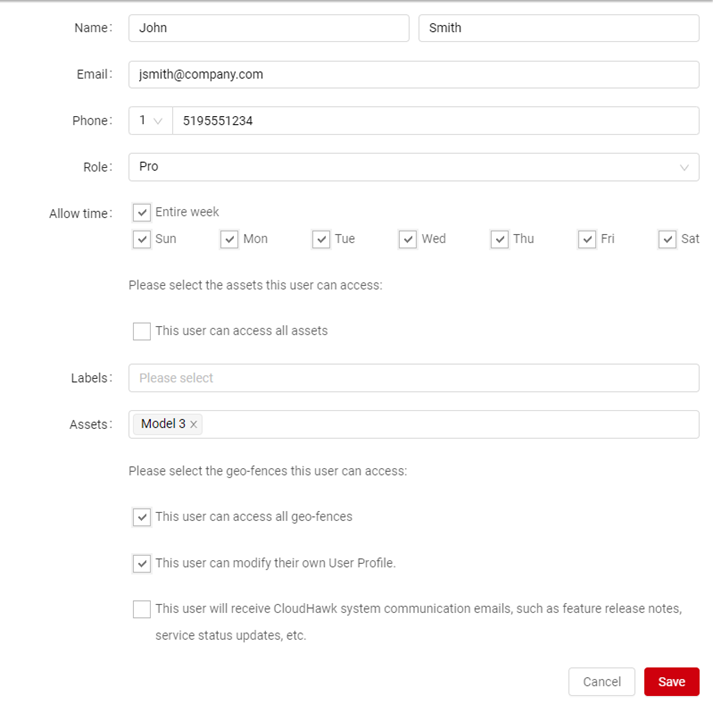
Complete the new user’s profile information & select their role
In this form you will be required to fill in all information pertaining to the new users.
To determine the user’s permissions in the CloudHawk Portal, select their role. The user’s role can be Admin or another default role, or a custom role that you have created. The Installer role is a special role that will not allow them to access the CloudHawk Portal, they will be redirected to the Installer Portal where they can only configure new assets and access diagnostic data.
If select a role other than Admin, you can also control which Labels and/or Assets you would like this user to see, as well as Groups and Geo-fences. Simply click the field and select the items you would like them to access. You can also check the boxes for This user can access all assets/geo-fences to provide them with full access.
Learn more about roles and how they affect what CloudHawk Support can do for users in your account: Understanding User Roles When Contacting CloudHawk Support
Once completed, click the Save button on the bottom to finish adding a new user.
Registration Email Sent to New User
Once the above steps are completed, an email requesting registration will be sent to the new user. They will be asked to set a password and accept the CloudHawk Terms of Service when clicking the registration link in the email.