Now that you have received your CS102 CloudHawk sensor units, please review the following article which provides tips and best practices for installing your device.
Please note that CloudHawk door sensor magnets are extremely strong. Please ensure proper handling by keeping magnets at a safe distance away from each other and other magnetic objects. Improper handling can lead to injury and/or broken magnets.
Sensor Alignment
The CS102 CloudHawk wireless door sensor and magnet must be positioned correctly for proper functionality.
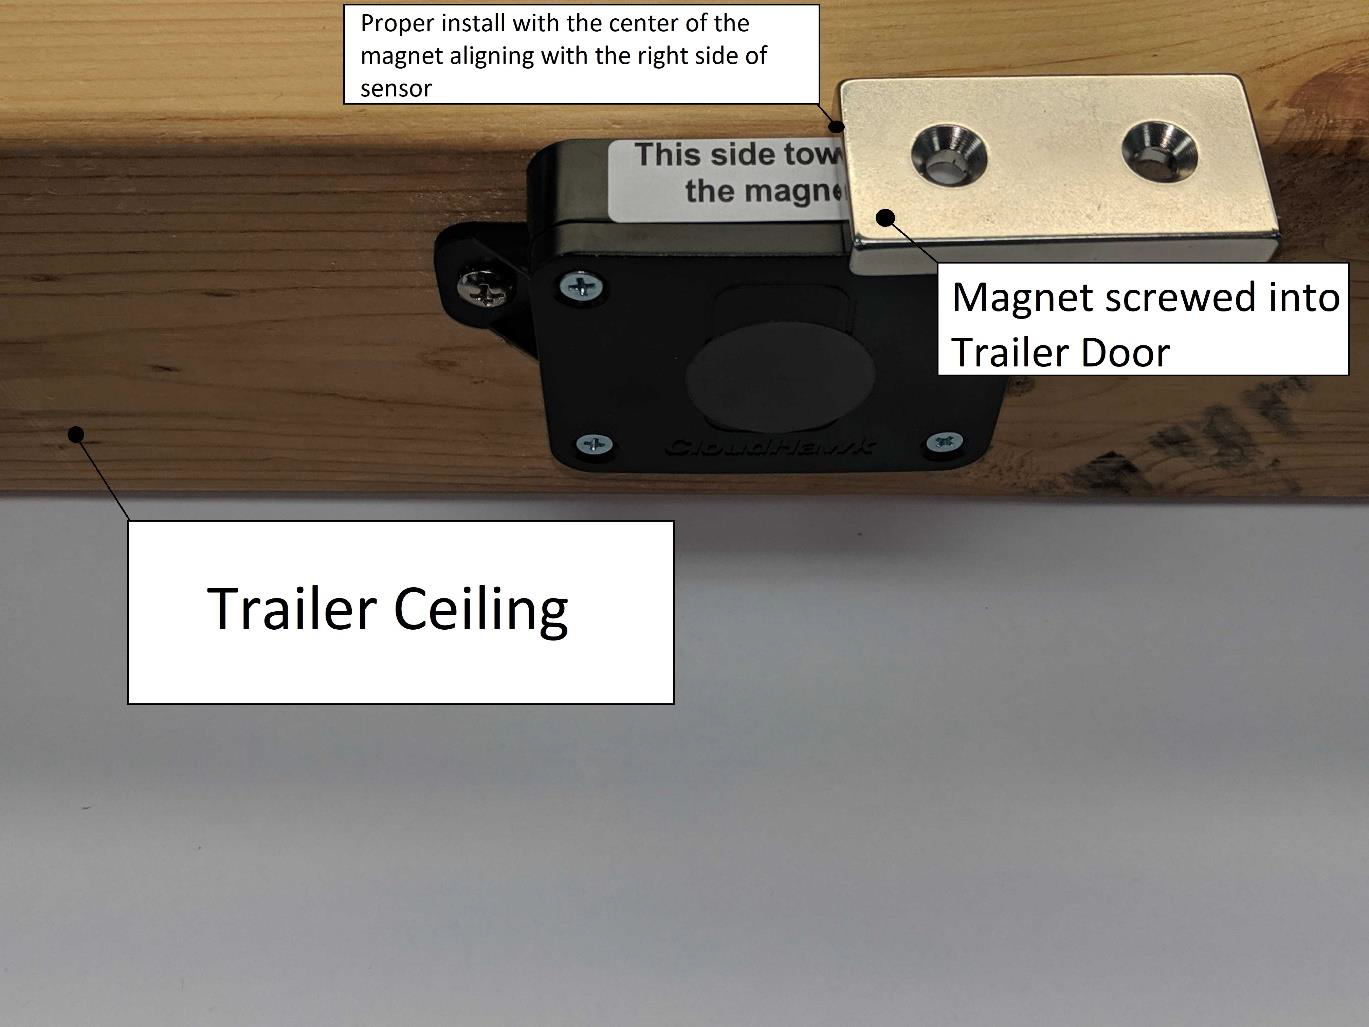
The centre of the bar magnet (between the two screw holes) must line up with the right side of the label that says, This side towards the magnet. See Figure 1 and Figure 2 below for an example.
Sensor Placement
The CloudHawk wireless door sensor must be screwed into the ceiling of the trailer. Use the two earlobes on the sensor with the screw holes to fix onto the trailer ceiling. Ensure that label that says This side towards the magnet is facing outward towards the trailer doors.
Bar Magnet Placement
The magnet is to be screwed into the trailer door. Use both screw holes on the magnet bar to fix onto the inside of the trailer door.
When screwing in the magnet please do so lightly so that it does not break or damage the magnet.
Pairing the Wireless Door Sensor with a CloudHawk Tracker
Complete the following steps in the Installer Portal. For more information about accessing the Installer Portal for a tracker, click here
- Click “Add new sensor” at the bottom of the configuration page
- Click the top row, labelled Sensor, and select Wireless Door Sensor.
- Click on the Sensor ID field and select the sensor you are installing. You fill find this ID on a white label on the physical sensor. If you have a large number of sensors available in your account, you can use your browser’s Find function (usually Ctrl+F) to locate the correct ID.
- Fill in the Name field. Typically, customers use the location of the sensor as the name. For example, “Front” or “Trailer Door”
- Click Save.
Figure 1
Ensure the center of the magnet aligns with the right side of the door sensor when attached to the trailer door
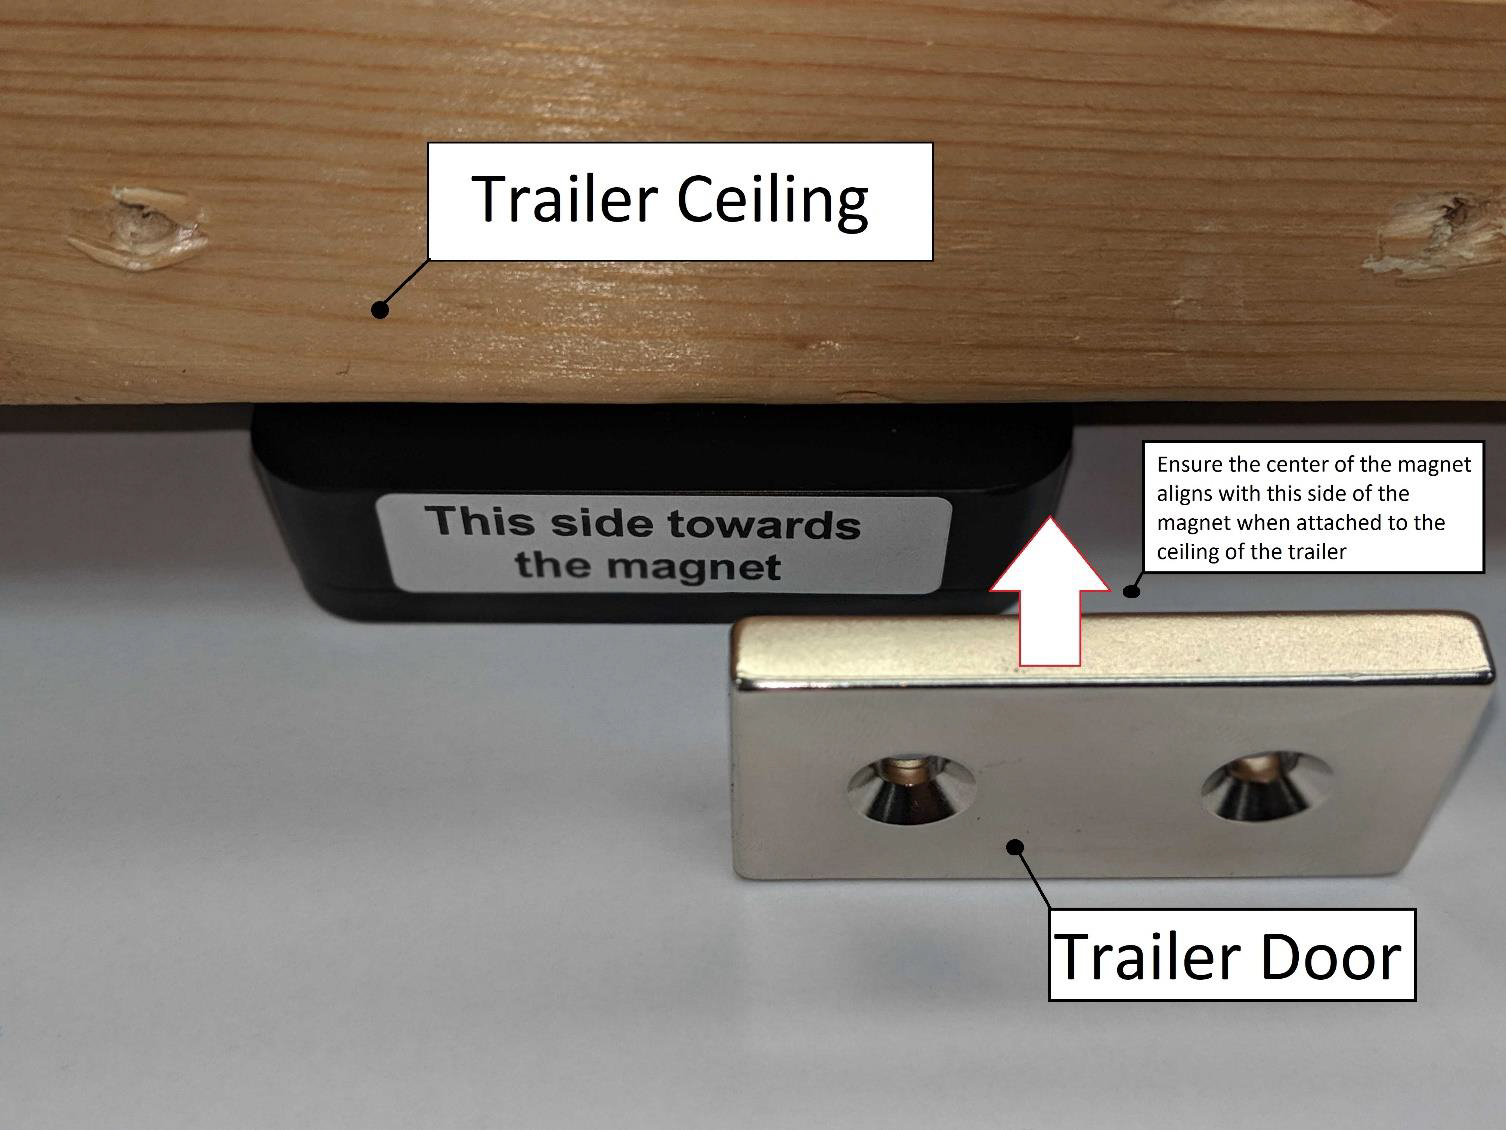
Figure 2